Showing posts with label chicken. Show all posts

Wednesday, October 8, 2014

New Recipe: Chicken & Dumplings Casserole

I've declared it Comfort Food Week at my house! Fall is HERE and I love it. I've been wanting to cook and eat some good comfort food. I enjoyed summer cooking, enjoyed finding good things to eat that didn't make me want to anchor myself to the couch. But comfort food season is here and this week I'm going a little crazy.

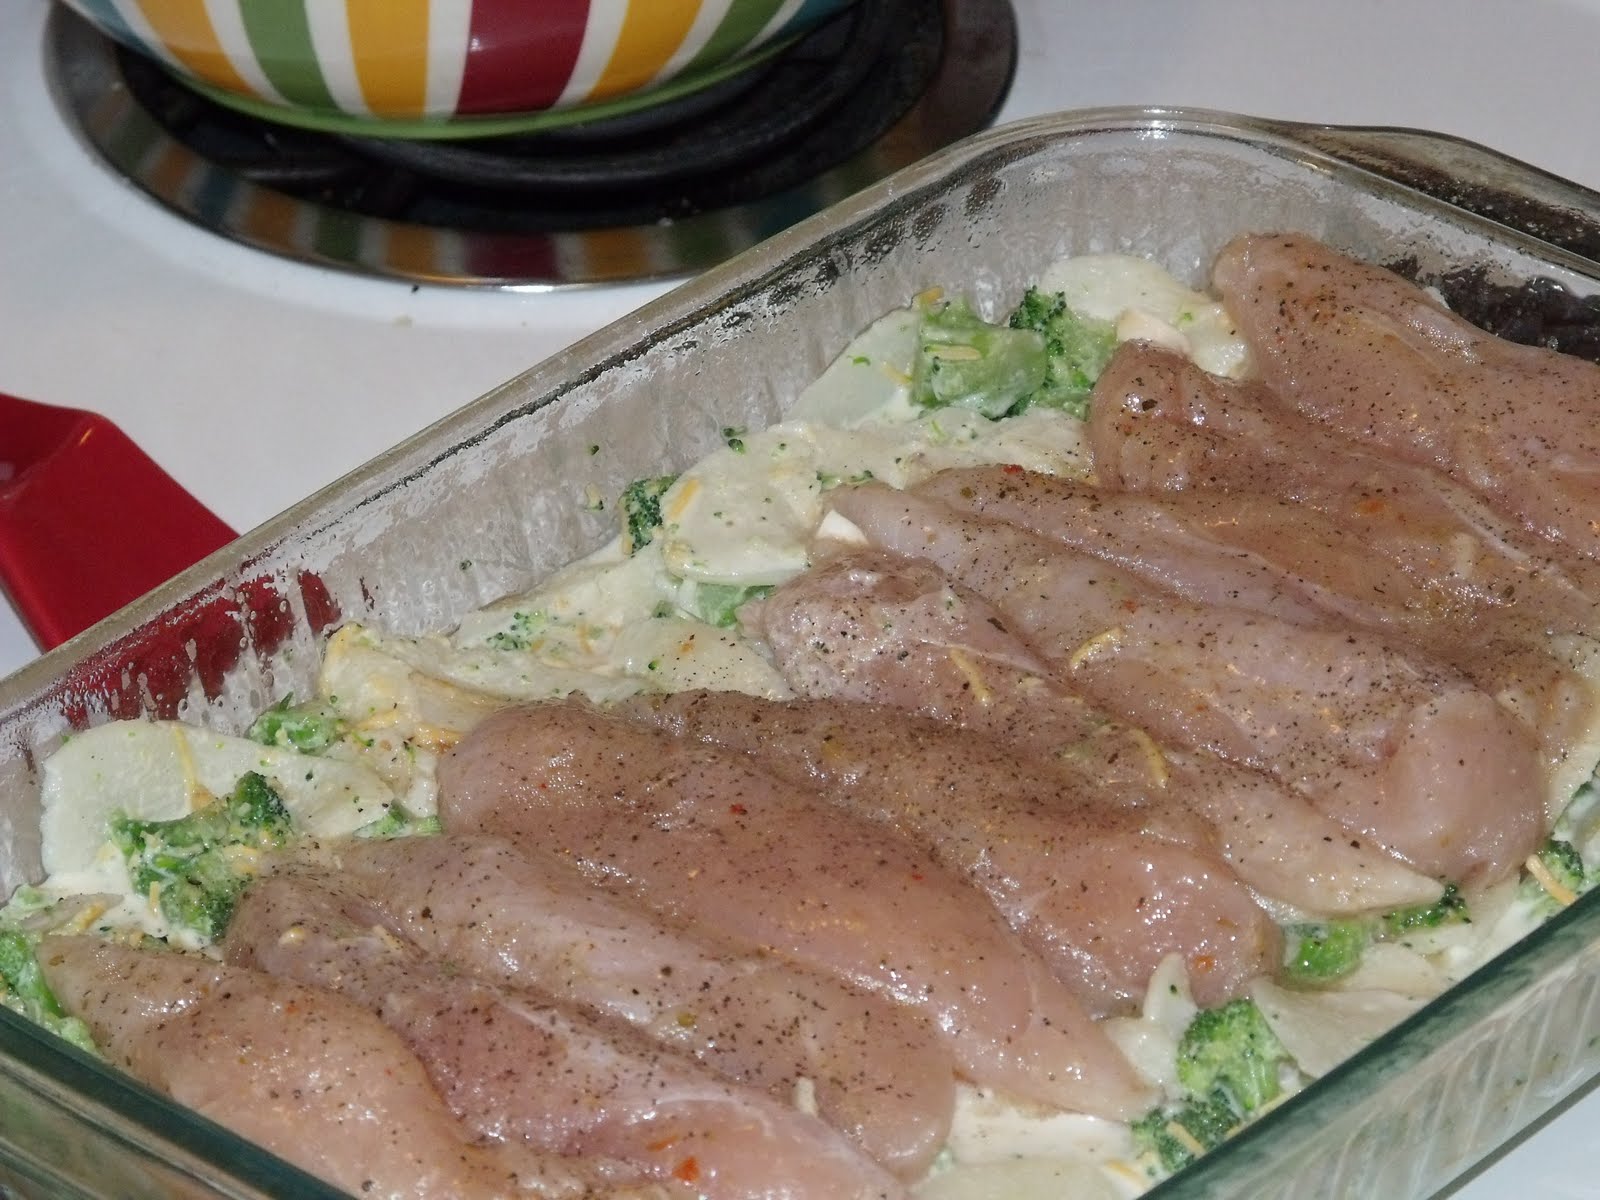
I've got three new recipes to try on my menu this week (four if you count the no-bake dessert I'm taking to my mother-in-law's on Saturday)...I'm feeling a little ambitious! Monday night I tried this Chicken & Dumplings Casserole from The Country Cook. I've seen several variations of this casserole but this one in particular I noticed last week and it looked like a good weeknight meal. I'm a big fan of chicken & dumplings but have never made them from scratch myself (though I enjoy eating it when others take the time). This casserole was a good substitute. SO yummy! I'm excited that I decided to try it.  


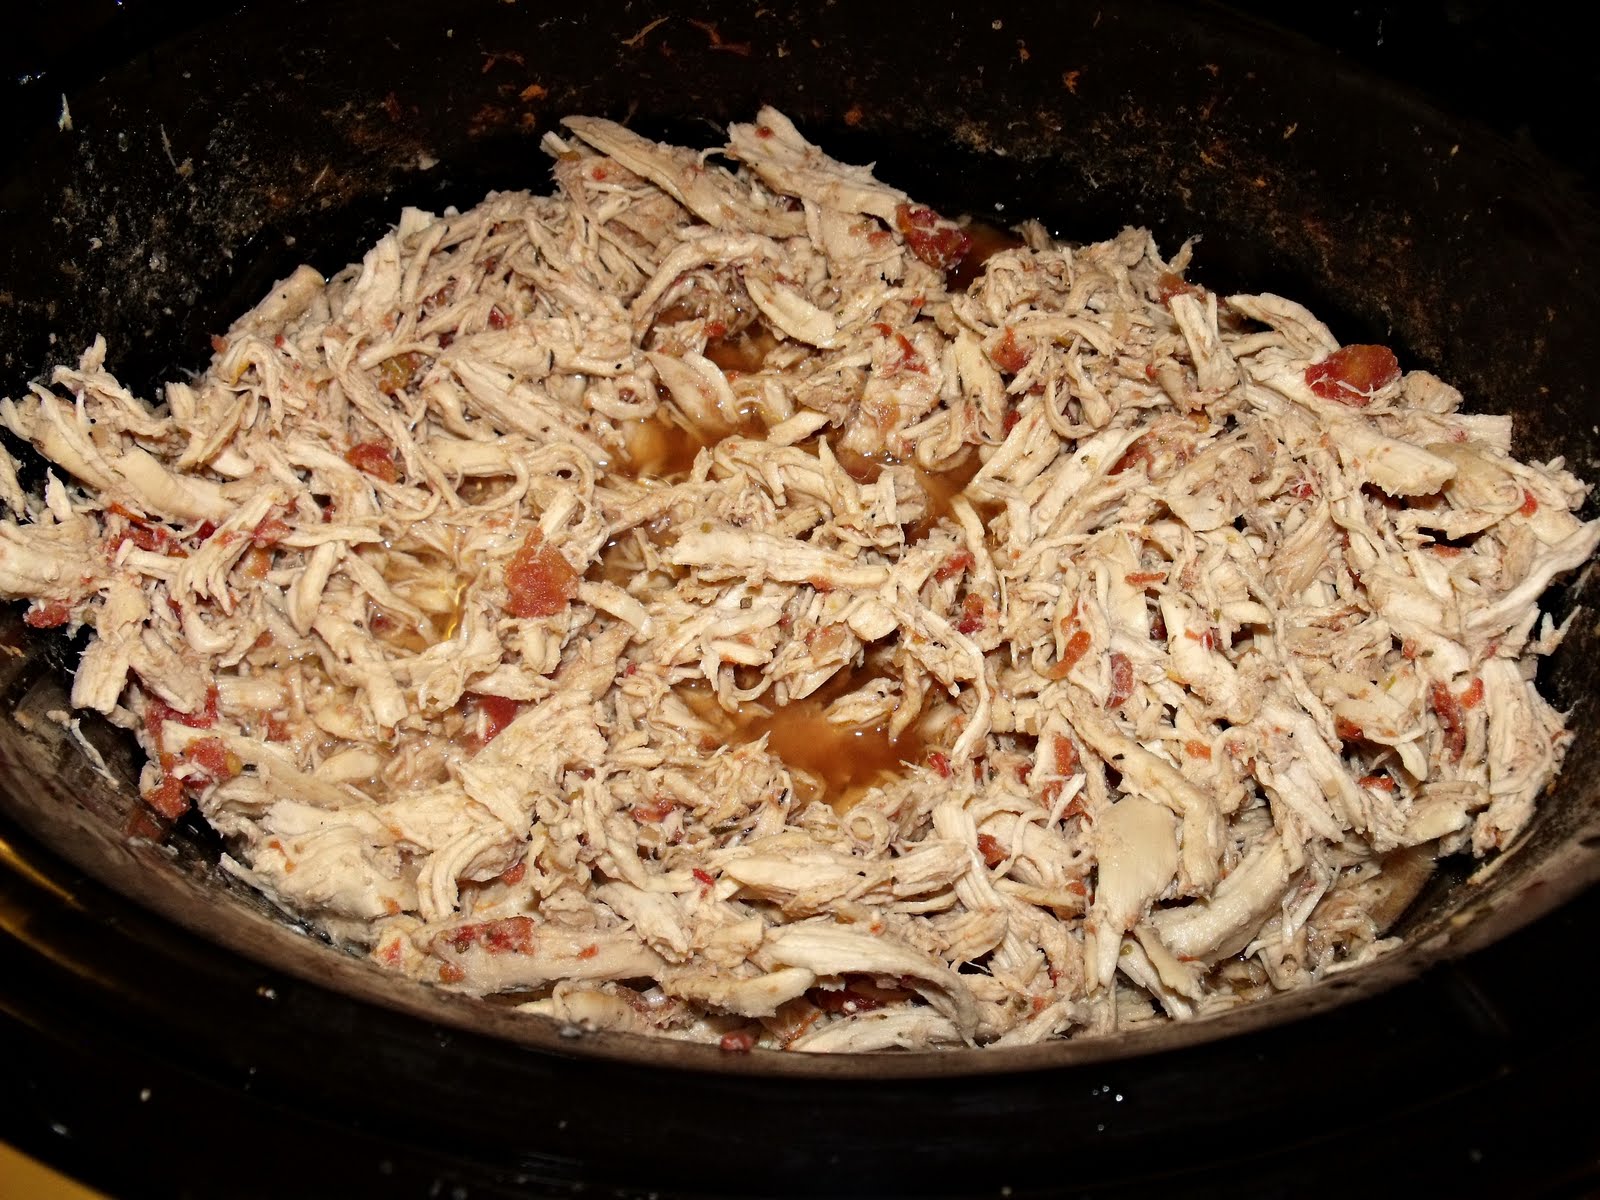
This picture really doesn't do it justice at all.
Chicken & Dumplings Casserole

Ingredients:

  • 1/2 cup (1 stick) butter
  • 1/2 cup onion, chopped
  • 2 ribs of celery, chopped
  • 3 cups cooked chicken (shredded or cubed)
  • 1 cup self-rising flour
  • 1 cup milk (2% or higher)
  • 2 cups chicken broth
  • 1 can Cream of Chicken Soup
  • salt & pepper to taste
Directions:
  1. Preheat your oven to 350. Spray a 9x13 casserole dish with cooking spray.
  2. In a skillet over medium heat, melt your butter then add your chopped onion and celery. Cook until the veggies are soft (this took at least 10 minutes for me). You can season your veggies with salt & pepper if you like.
  3. Pour the veggies and all that glorious butter into your casserole dish and spread it around so it covers the bottom. Layer your chicken on top of the veggie/butter mixture (season with salt & pepper if you so desire).
  4. In a mixing bowl combine your self-rising flour and milk then pour it over the chicken layer. Do not stir!
  5. In the same mixing bowl (you could use a new one but why?), mix your Cream of Chicken soup and chicken broth. At this point you can season this with salt & pepper too. Pour that mixture on top of everything in the casserole dish. Again - do not stir!
  6. Pop your uncovered dish into the oven to bake for 40-45 minutes or until your casserole is set. (As Brandie - The Country Cook - notes, everyone's oven is different. This took about 45-50 minutes in my oven).
  7. You could finish this with a sprinkle of parsley if you want to make it pretty. I was too hungry and too excited to eat this to remember parsley.
Recipe Source: The Country Cook (She has great step-by-step photos of this dish and some good suggestions along with a plug for the cookbook she got it from. Also, her site is loaded with great recipes.)


Notes/Suggestions:

  • You can use a rotisserie chicken for the chicken in this dish, usually I would. But the store where I prefer to buy them was out so I bought a package of chicken breasts (I think there were 5 in there), boiled them in seasoned water, then trimmed & cubed them when they were cooled a little. Typically I'm not a fan of boiled chicken but it totally worked here. Next time, I'd maybe use Brandie's tip for shredding the chicken in my stand mixer.
  • A stick of butter is a lot of butter to me. Usually I'd cut it down but I was worried it may affect the dumplings layer so I used the whole stick. This dish was super so I don't know that when I make it in the future if I'd mess with the butter. Plus, I love butter.
  • See THIS POST about the lower sodium ingredients I use (says the girl who just admitted she loves butter). I did use the low-sodium chicken broth I have on hand but had to buy regular Cream of Chicken soup (the store was out of the healthy request stuff). It was delicious as is but I think next time I'll use the healthy request just to make myself feel a bit better about that stick of butter).
  • I cooked & chopped my chicken the night before and also the celery & onions. Since this dish takes 40-45 minutes to bake, I wanted to be able to put it together as quick as possible. The early prep made it much more week-night friendly.
  • Husband & I really enjoyed this dish (and it heated wonderfully the next day for my lunch!). Grant, not so much. But he's weird about casseroles. Husband isn't a fan of celery in things and I'm not a fan of onions but neither of us minded our less-than-favorite veggies in this dish. It had great flavor.
Enjoy!


Tuesday, February 4, 2014

New Recipe: Monterey Chicken Pasta Bake

I have been a new recipe fool lately. I was going to say "new recipe whore", but my mother-in-law reads this so I'm thinking I shouldn't use the word "whore" in posts my mother-in-law reads. So I'm going with new recipe fool. Anyway, I was going to through some past issues of Kraft Food & Family one weekend and came across several yummy recipes to try. I've been very lazy about cooking lately and I think it's mostly because I'm bored with all my usual dinner suspects.

Enter Monterey Chicken Pasta Bake. It's sort of like macaroni & cheese on steroids. Not the kind of steroids that spark a federal investigation and get you suspended from baseball games. Good steroids. The kind of steroids that your macaroni & cheese would take to make you love it more. So...it's really good.


Monterey Chicken Pasta Bake

Ingredients:
  • 3 cups rigatoni pasta, uncooked
  • 1/4 cup butter
  • 1 small onion, finely chopped
  • 1/4 cup flour
  • 1 can (14.5 oz) fat-free reduced-sodium chicken broth
  • 1 pkg. (7 oz) shredded Monterey Jack cheese, divided
  • 3 cups chopped cooked chicken
  • 6 slices bacon, cooked and crumbled
  • 2 Tbsp. grated Parmesan cheese
  • 1 Tbsp. chopped fresh cilantro
  • 1/2 cup chopped tomatoes
Directions:
  1. Heat oven to 350 degrees.
  2. Cook pasta as directed on package (omitting salt).
  3. Melt butter in a large nonstick skillet on medium heat. Add onions; cook and stir 6 minutes or until crisp-tender. Blend in flour; cook and stir 1 minute. Gradually stir in broth; cook 5 minutes or until thickened, stirring constantly. Add 1 cup shredded cheese; cook and stir 1 minute or until melted.
  4. Drain pasta. Add to ingredients in skillet along with the chicken and bacon; mix well. Transfer to a 13x9-inch baking dish sprayed with cooking spray; top with remaining shredded cheese. Cover.
  5. Bake 40 minute, uncovering and topping with Parmesan for the last 10 minutes. Top with tomatoes and cilantro.
Recipe Source: Kraft Foods Recipes


Notes/Suggestions:
  • If you've ever read one of my new recipe posts, this will come as no surprise but...I added twice the amount of cheese called for in the above original recipe. And it was fantastic.
  • I also used 9 instead of of 6 pieces of bacon. I like to live dangerously. The use of extra bacon was very much Husband-approved.
  • I think cilantro is yucky so I omitted that and just sprinkled some dry parsley on top for pretty.
  • This is a bit of a time consuming dish, or at least it was for me. And I even cut corners by using rotisserie chicken and onion powder in place of chopped onions. It's not a really quick weeknight meal but I'm definitely keeping it in my recipe arsenal.
Enjoy!

Monday, January 23, 2012

New Recipe: White Chicken Enchiladas

Another new recipe? Hooray for me! It seems that I'm working my way out of the recipe rut that I had said I'd gotten into. Although, taking medicine that makes me feel like I've pounded three pots of coffee in a very short period of time is probably helping me in the motivation department. Who cares. I'll take it. After weeks of feeling like doing nothing more than anchoring myself to the couch it feels good to have some ambition.

This new recipe comes, once again, by way of Pinterest. If that's not a site you're familiar with then you should get familiar with it in a hurry! There are so many great things there. I saw this recipe just this past week and with the small ingredient list and very basic instructions, I knew it would work itself into our menu soon. So I made it last night.


White Chicken Enchiladas
with green chili sour cream sauce

  • 10 soft taco shells
  • 2 cups cooked, shredded chicken (I used a rotisserie chicken)
  • 2 cups shredded Monterey Jack cheese
  • 3 Tbsp. butter
  • 3 Tbsp. flour
  • 2 cups chicken broth
  • 1 cup sour cream
  • 1 (4 oz) can diced green chilies
Directions:
  1. Preheat oven to 350 degrees. Spray a 9x13 pan with non-stick cooking spray.
  2. Mix chicken and 1 cup cheese. Evenly distribute the chicken/cheese mixture and roll it up in the tortillas. Place them in the prepared pan.
  3. In a sauce pan over medium heat, melt butter. Stir in flour and cook 1 minute. Add broth and whisk until smooth. Heat until thick and bubbly.
  4. Stir in sour cream and chilies. Do not bring to a boil, you don't want curdled sour cream.
  5. Pour over enchiladas and top with remaining cheese.
  6. Bake 20-22 minutes and then broil on high for 2-3 minutes to brown the cheese. Let stand 10 minutes before cutting into it.
Recipe Source: Joyful Momma's Kitchen


Notes/Suggestions:
  • I don't really "do" spicy so I was kind of a wuss about the green chilies. I didn't use a full 4 ounces and I also drained them considerably. Next time I'll be a little braver because I really couldn't tell they were there. So little heat from them, in fact, that I would have let Grant have it instead of the lasagna that he did have.
  • My sauce never got "thick and bubbly" while I was cooking it but after it cooked in the casserole pan and sat for a few minutes after I took it out of the oven I felt like it was the perfect consistency.
  • This is a fairly "naked" dish so it's got a lot of room for creativity if you feel like getting crazy. You could add all sorts of stuff in with the chicken & cheese mixture. Husband's first suggestion was bacon...men and bacon.
  • The only adjustments I made were to the sauce. I added a little bit of salt because I use a very low sodium chicken broth and I like that I can control the amount of salt that goes into the sauce. I also added a little bit of onion powder. However, I did not use any extra cheese! I'm kinda proud of that.
  • Great dish for picky eaters! I can say that with confidence because I'm pretty picky. Also a good weeknight dish because it goes together very easily. Especially if you use a rotisserie chicken. I cooked a little bit of white rice to go with them but you could skip the rice and go for a side salad or vegetable too.
I'd love to know if anyone tries it. Enjoy!

Stay tuned in the next couple days for another new recipe! My kitchen is a busy place these days!

Wednesday, September 21, 2011

New Recipe: Cheesy Chicken Casserole

I have lost count of how many recipe websites have my e-mail address. But there are enough that I get at least 20 new recipes in my e-mail every day. Some I delete because I know I'd never attempt to make them and some I delete because they just don't look good. But the ones that look yummy AND Grant friendly? Keepers. This recipe for Cheesy Chicken Casserole I saw in an e-mail and I made it the next night. It's a little bit like the Chicken Tetrazzini that I posted a while back. Nothing went to waste, it was super yum.


Cheesy Chicken Casserole
3 to 4 cooked chicken breasts, chopped
(you can use the meat from a rotisserie chicken from the grocery store deli)
1 (16 oz.) package egg noodles, cooked
1 (24 oz.) container light sour cream
2 cans Campbell's Healthy Request cream of chicken soup
1 (8 oz.) package shredded cheddar cheese
1 (8 oz.) package shredded mozzarella cheese
1 sleeve Ritz crackers, crushed
1/4 cup margarine, melted

  1. Combine chicken, noodles, sour cream, soup, and cheese in a large bowl.
  2. Pour into a 13" x 9" baking dish that has been sprayed with non-stick cooking spray.
  3. Mix together cracker crumbs and margarine and sprinkle over the top.
  4. Bake at 350 degrees for 25-30 minutes or until the crackers are golden brown.
Adapted from: myrecipes.com


Toddler tested. Toddler approved.
Notes/Suggestions:
  • My only real problem with this recipe was that it needed a vegetable added to it to make it feel like it was better for me. Only that didn't occur to me until we were eating it. Next time I'll probably add some broccoli and/or maybe some carrots because that's Grant's favorite veggie.
  • Reheats well for lunch the next day. And then for dinner again. It's kind of a huge casserole. 
Enjoy!

Friday, September 9, 2011

New Recipe: Crock Pot Chicken Taco Meat

Like my new look for fall? The weather is starting to show signs that fall is coming and fall is my favorite season. So I thought I'd do a little redecorating for my blog :)

Another crock pot recipe! LOVE my crock pot! We had a mexican themed luncheon at work recently and my friend, Henri, brought some yummy shredded chicken for us to make tacos with. I provided the mustaches:


 Ha! Ok, back to the chicken. I had a huge package of chicken in the freezer so over the weekend I decided we'd have chicken tacos on Monday (and Tuesday because we had a lot of leftovers).


Crock Pot Chicken Taco Meat

1 lb. boneless skinless chicken breasts
1 package fajita seasoning or chicken taco seasoning
1 cup chicken broth
1 can Rotel tomatoes, undrained (I used mild)
Garlic powder to taste, optional

Instructions:
  1. Dissolve taco/fajita seasoning in chicken broth. Mix in Rotel if you're using it.
  2. Place chicken breasts in crock pot and pour chicken broth mixture over the chicken.
  3. Cover and cook on low for 6-8 hours.
  4. With two forks (or you can just use your hands) shred the chicken into bite size pieces.
  • To freeze: Place shredded meat into freezer bags with the juices. Press out all the air and seal.
Recipe adapted from: Food.com


Mmmm...
Notes/Suggestions:
  • I used twice the amount of chicken (because that's just what was in my freezer) so I doubled the amount of chicken broth. The other ingredients could be doubled as well but since I was planning for Grant to eat it as well, I didn't want it to be too spicy. (But he didn't have much interest in it.)
  • Check out the original recipe reviews for some great ideas on how to turn this into a soup. I'm sure it would be really yummy.
  • I'm told this freezes well so it would be great to double up on and freeze half for an easy weeknight meal.
  • I used a low sodium chicken broth. I always try to use a low sodium chicken broth but they usually still have a lot of sodium in them. Through a friend I found a VERY low sodium chicken broth. I found it at Harris Teeter (for anyone reading this that has one in their area) and the brand is called Pacific. It's an organic broth and I usually don't buy into all that organic hype but this only has 70 mg of sodium per serving compared to others that have close to 500 or more. It's a little more expensive but so worth it - and still tasty too.
  • Check out some other recipes from my friend Henri: Pork Tenderloin (also a crock pot recipe) and Chicken Tetrazzini (great make-ahead meal)
Enjoy!

Thursday, August 18, 2011

New Recipe: Crockpot BBQ Chicken

I love, love, love my crockpot. Crockpots - I have three. And I love them all. I firmly believe crockpots are magic. You put in a bunch of ingredients and in anywhere from 4 to 8 hours, depending on what you're cooking, you have a delicious meal. AND you get to claim you cooked it. When, really, it was the magic of the crockpot.

This recipe came by way of Pinterest which is a website that I'm currently addicted to and is causing some serious ADD at work (and anywhere else really because I also have the Pinterest app on my phone). So anyway, I came across the recipe on Pinterest and it looked so yummy and easy that I had to give it a whirl.


Crockpot BBQ Chicken

4-6 pieces Boneless Skinless Chicken Breasts
1 18-Ounce Bottle BBQ Sauce (I used Sweet Baby Rays)
1/4 cup Vinegar
1 tsp. Red Pepper Flakes
1/4 cup Brown Sugar
1/2 - 1 tsp. Garlic Powder

Mix the BBQ sauce with all ingredients listed under it. Place the chicken in crockpot.
Pour the sauce over it and cook on LOW for 4-6 hours, stirring occasionally.

Recipe source: Stick A Fork In It

Notes/Suggestions:
  • The blogger who posted this recipe put her chicken in the crockpot frozen. I didn't, I like to trim my chicken before cooking. So make sure your cooking time is adjusted to your chicken. My chicken was done before 4 hours and I had 7-8 chicken breasts in there.
  • I felt like it cooked a little fast and so the chicken was a little dry. Not to worry, the sauce was GREAT so we just put a little more on the chicken and all was well with the world.
  • I made this recipe on a day when my mother-in-law was coming over for dinner. It's a little scary making a new recipe for company but it was Husband, Mother-in-law, and even BABY approved. Even Grant had a little bit of Mama's chicken.
  • Make the sauce exactly how it states in the recipe and you will not be disappointed. It was really good. I was scared of the pepper flakes but they weren't too much. And I think I ended up using a whole teaspoon of garlic powder, but I love garlic.
I served the chicken with twice baked potatoes:


And also some homemade garlic cheddar biscuits that I'll be posting the recipe for soon :)
Enjoy!

Saturday, July 30, 2011

New Recipe: Buffalo Chicken & Potato Casserole

I didn't think I was going to get in my two new recipes for this month. But I managed to pull them both off this week (I will try to post the second one tomorrow). Monday night I decided it was time for something different. I had been eyeing a recipe for Buffalo Chicken & Potato Casserole that I figured Husband would love and I decided it was time to make it. I'm not a huge fan of spicy food but I figured I could handle this one. In the interest of trying something new I kept an open mind.

Looks yummy, doesn't it?
I'm going to be honest: I didn't like it at all. And it had nothing to do with the hot sauce, that part actually wasn't bad or too hot for me. I felt like the casserole was just missing something. It does have quite a bit of ranch in it and I'm not a lover of ranch so that could be part of my problem with it. Why post the recipe, you ask? Well, I did challenge myself to try two new recipes each month - and post about my findings whether they be good or bad. But also - Husband loved it. He literally ate 3/4 of the casserole dish and said he'd eat it again if I made it. And he brought the leftovers to work and a co-worker of his gobbled it up and said it was great. So perhaps, I'm just overly picky.

Buffalo Chicken & Potato Casserole

  •  1 1/4 lb boneless skinless chicken breasts, cut into 1-inch strips
  • 1/3 c. Franks buffalo sauce
  • 6 c. potatoes, grated w/ box grater
  • 1 c. light ranch dressing
  • 1/2 c. cheddar cheese, shredded
  • 1 can condensed cream of chicken soup
  • 1/2 c. panko bread crumbs
  1. Heat oven to 350 degrees F. Spray 13x9-inch baking dish with cooking spray.
  2. In a medium bowl, stir together chicken strips and buffalo sauce. Spoon into baking dish in a single layer.
  3. In the same bowl, stir together potatoes, dressing, cheese, and soup. Spread over chicken. Sprinkle panko evenly over the top.
  4. Cover with foil. Bake 30 minutes; uncover and bake 20 to 25 minutes longer or until potatoes are tender and juice of chicken is no longer pink when center of thickest pieces are cut.
Recipe source: Holy Cannoli Recipes


Notes/Suggestions:
  •  For some reason the potatoes didn't cook completely for me. I did exactly as the recipe said and I grated fresh potatoes. If I try it again I may use frozen hash browns. The fresh ones were very wet and I felt like they made the potato mixture very soupy.
  • I thought the light ranch made for a bad taste. Or maybe I needed to use a name brand ranch instead because I bought the store brand. I try not be a store brand snob because most of the time I find no difference in the store brand versus name brand but in some cases it does make a difference.
  • This recipe could use more chicken. I used exactly the amount of chicken called for and it cooked just fine. But underneath all those potatoes it did seem to turn into a game of Find the Chicken.
  • I firmly believe that this recipe needs bleu cheese. Somewhere. Crumbled or in dressing form. But it is a "buffalo chicken" recipe and it's begging for some bleu cheese.
I'd love to hear the results if anyone out there decides to try this!

Wednesday, June 22, 2011

New Recipe: Grilled Buttermilk Chicken

For our Father's Day cookout, I decided to try out a chicken recipe that I've had my eye on for a few weeks now. I got the recipe from myrecipes.com and it's called Grilled Buttermilk Chicken (click it for the recipe). It was so good and so simple to make, I'm so glad I tried it! Basically you make a brine with all the ingredients. Trim up your chicken and let it soak in the brine for a day (4 hours is the least amount of soaking time recommended). When you're ready to cook it take the chicken out of the brine, wipe it off and throw it on the grill! Super easy.

Ingredients


Chicken soaking in the brine. I forgot to take a picture before
I put the plastic wrap on my bowl. Oops.

Voila! Yummy Grilled Buttermilk Chicken! (I know it looks like
your run-of-the-mill grilled chicken but it doesn't taste like it!)
Notes/Suggestions:
  • The recipe calls for chicken thighs and drumsticks but I used a large package of boneless skinless chicken breasts in an attempt to be healthier. They were delicious. I'm sure if you decide to use the thighs and drumsticks they would be good too. But I think I'll continue to make it with the chicken breasts.
  • FYI: The chicken breasts were super thick so I had to cut them in half so they'd be thinner and not take so long to cook. Plus it cuts out the possibility of cutting into it and realizing it hasn't cooked all the way through. Yuck.
  • The recipe only says "buttermilk" so I used non-fat buttermilk. I'm not sure if there are other kinds of buttermilk but I thought the non-fat worked great.
  • I had to use garlic powder in place of fresh garlic because Husband threw out my garlic and I was not about to trek out to the grocery store. It tasted good but I look forward to using fresh garlic next time.
  • Leftovers are so good (can you say yummy lunch?) and the chicken even tastes good cold. It would be good for a picnic if you cook it ahead of time.
Enjoy!

Wednesday, April 13, 2011

New Recipe: Chicken, Broccoli & Potato Divan

Finally a new recipe! I haven't had much time to recipe hunt so last night I went with yet another recipe using the Philadelphia Cooking Creme. Man I love that stuff! I'm trying to broaden my horizons in the dinner department...hence the reason for trying at least two new recipes each month. This one isn't too far outside the box for me...but at least it has a vegetable in it. I'm trying to work on that too. I feel like I can say this because I didn't invent the recipe: YUM! This was delicious. And so easy. None of the ingredients had to be cooked before going into the casserole pan which makes it perfect for a weeknight dinner. The recipe can be found HERE.


Ingredients!

Marinate the chicken

Mix the cooking creme and milk

Add the potatoes, broccoli, and some of the cheese to the mixture
 
Spoon it into a 9 x 13 casserole dish coated with non-stick spray

Put the marinated chicken on top (throw away the marinate)

Cover and bake!
 
Garnish with cheese at 45 minutes and return to oven (uncovered)

Mmmm...who's ready for dinner?

Notes/Suggestions:
  • I used 1.5 lbs. of chicken tenders instead of the 1 lb of chicken breasts called for in the recipe. I feel like I eat a smaller portion when the pieces of chicken are smaller and there also seems to be more left overs (lunch - yum!). The thin sliced chicken breasts work well also if you're trying to control your portion size.
  • I only marinated the chicken for 20 minutes because I was impatient and starving. I just couldn't wait another 10 minutes. I thought the chicken tasted great and was very tender but hopefully next time I can wait the full 30 minutes.
  • I microwaved the broccoli for a few minutes (since it was the steam fresh kind) because I'm not into super crunchy broccoli. I also gave it a quick chop before adding it to the potatoes so it would be more bite sized. You don't have to, but I liked it.
  • I couldn't find the specific cheese called for in the recipe so I just used a store brand cheddar cheese. I don't think it made a difference in the taste (and it was cheaper).
  • This smelled amazing while it was cooking and I will totally make it again! (Plus it reheated well today for lunch!)
I hope if anyone decides to make this that you enjoy it! You can check out the other recipes I've made using the Philly Cooking Creme HERE and HERE.

Saturday, February 12, 2011

New Recipe: Chicken Tetrazzini

Yesterday Nate came home after a very long week (for both of us) away on business. I figured that he would probably be tired of eating out so I wanted to make him something yummy for dinner. I got this Chicken Tetrazzini recipe from my friend Henri - who was also the provider of the yummy Pork Tenderloin recipe. She's made it a few times for our work luncheons and it's always so good, I figured Husband would like it too. And I was right. He had two big helpings and then I walked into the kitchen to catch him eating straight from the casserole dish with a fork. I guess I'll be making this one again.

I altered the recipe slightly so I'll give you the original and put my alterations in my notes/suggestions.

Chicken Tetrazzini

1 box (7 oz.) thin spaghetti
1 jar (6 oz.) sliced mushrooms, drained
1 large onion, diced
1/2 cup butter or margarine
4 boneless skinless chicken breasts, cooked
2 (10 oz.) cans cream of chicken soup
2 cups sour cream
1/2 cup Parmesan cheese

Break spaghetti into 1-inch to 2-inch pieces. Cook in salted water until tender. Drain. Saute mushrooms and onions in butter. Cut chicken into 1 to 2 inch pieces. Combine chicken with spaghetti, mushrooms, onions, soup and sour cream. Stir and turn into a buttered dish (2 quart casserole dish). Sprinkle with Parmesan cheese. Bake, uncovered, at 350 for 40 minutes. Makes 6 to 8 servings.

Sounds good, doesn't it? It was. The best thing was that I was able to put it all together Thursday night (thank you Grant for behaving) and refrigerate it over night. All I had to do when I got home last night was put it in the oven. 


Cooked spaghetti

Pulled rotisserie chicken

Mixing everything together


Grant and Mortimer watching Mommy cook.

Ready to go in the fridge for the night!
 
Cooking the mushrooms for Husband


Yum! Ready to eat.
 
You can't have pasta without garlic bread! Yes, I use the frozen kind. Don't judge.

Notes/Suggestions:
  • I use the Ronzoni Smart Taste pasta whenever I can find it. The box of thin spaghetti was 14.75 oz. so I only cooked half. It wasn't enough so I ended up cooking the rest of the box and used almost all of it. So I would suggest cooking the whole box and adding it little by little when you mix up the sauce. I think I used about 3/4 of the pasta that I cooked.
  • I once again used rotisserie chicken in place of the cooked chicken breasts. I will say it again: I love, love, love rotisserie chicken. SO convenient and tasty.
  • I don't like mushrooms and I used onion powder in place of the onions. That allowed me to leave out ALL the butter in the recipe. I cooked the mushrooms on the side for Nate to add to his meal because he loves them so that was the only butter used in the recipe. I did add a little bit of milk when I mixed up the ingredients to thin out the sauce.
  • I used reduced fat sour cream (Henri suggested that because she does it too). One 16 ounce container of sour cream is 2 cups. You don't need to bust out the measuring cup.
  • This a great recipe to make up ahead of time but you don't have to. It's also a great recipe to make if you are bringing a meal to a friend/family (new baby, illness, etc.).
  • I spell rotisserie wrong every time I type it. Thank you spell check.

Sunday, February 6, 2011

New Recipe: Lasagna Rolls

Last night I decided to try something different making this my first new recipe of February. Yay me! This is a fun version of lasagna. The recipe can be found HERE courtesy of Holly at Life as a Lofthouse. It was so yummy! I'm really glad I decided to try it. I forgot to take pictures of my steps, but Holly has great ones in her post. Here is my finished product:


Notes/Suggestions:
  • I wouldn't say this is an easy weeknight meal. If you want to attempt it after you get home from work, more power to you. Not me though. I'm glad I saved it for a weekend night.
  • The recipe can easily be doubled for a larger family/crowd.
  • In place of the 2 chicken breasts I just used chicken pulled from a rotisserire chicken. It's my favorite recipe shortcut.
  • I replaced the chive & onion cream cheese with plain and I left out the basil. I'm not a fan of many flavored cream cheeses and I think basil is gross.
  • I used extra cheese...SUPRISE!

Wednesday, January 26, 2011

New Recipe: Creamy Chicken Pot Pie

I tried another new recipe last night! I've made chicken pot pie before, this is just a different version. I got this recipe (like this recipe) from the little pamphlet stuck to the top of the Philadelphia Cooking Creme container. I am loving that stuff! This recipe only had 4 ingredients and was quite tasty. The recipe can be found HERE.


Cookin' the chicken


Addin' the veggies

Mmmm...and then the sauce


Put in a pie plate and put a premade cust on top...

And Voila! Chicken pot pie.


There was some crust over-hang so I decided to play with the dough. Husband told
me that the decoration was pointless...but I thought it looked pretty


What are you going to do with it? I'm gonna EAT UM!!!!! (That's for my sis)
 Notes/Suggestions:
  • The recipe calls for 2 cups of frozen vegetables but I used 2 cups canned vegetables. I don't like to use frozen vegetables in dishes like this because, to me, they usually taste like rubber.
  • This is a great recipe if you're looking for something comforting but not too filling. For a more complete meal, I'd suggest serving it with a salad.
  • Do not be scared by the "savory garlic" cooking creme! It was yummy and I didn't find it too garlicky.
If you decide to try the recipe, I hope you enjoy it!

Tuesday, January 18, 2011

New Recipe: Lemon-Broccoli Rice with Chicken

Since announcing that one of my goals this year is to make at least two new recipes every month I have been in search new recipes. I have a cookbook addiction so I've been looking through those and I've come across a few but nothing that got me too excited. What I really need are easy weeknight friendly meals. And I found one!

I'm a sucker for those signs at the grocery store that scream "NEW ITEM!" especially when it's in the cream cheese section. Those lovely people at Philadelphia that have stolen my heart already (who can't eat cream cheese with spoon?) have come out with cooking creme. Can I just say: What took so long?? Because they were a new item they were on sale AND attached to the lid are - you guessed it - recipes! I decided to buy two flavors so I'll post about the next recipe I make too.

Monday I decided to make Lemon-Broccoli Rice with Chicken (recipe can be found HERE). It looked easy and it also looked like I wouldn't hate myself when I got done eating it. And it was both! Start to finish it took 30-40 minutes and I had a good sized portion and was full but I didn't feel gross. I was uncertain about the combination of the garlic and lemon but I didn't really taste the garlic and I thought the recipe was delicious! Husband didn't go crazy over it, he said it was "missing something". He thinks it needed some crunch.

Small ingredient list, I love that

Cooking the chicken and garlic


Mmmm...almost done!
 
I have been fun of for my use of boil-in-bag rice but I stand by my choice! I love boil-in-bag rice and not only do I not have room in my kitchen for yet another gadget, but I have no desire for a rice cooker while this stuff is still on the market.


Finished product!
As I said, Husband was not wild about this dish but he did eat it. I had thought it would be more up his alley than mine but I guess it's the other way around. I will definitely make this again and I look forward to making another of the cooking creme recipes.

Notes/Suggestions:
  • The recipe calls for oil which I didn't realize I was missing. So I used a tablespoon of margarine in it's place and I thought it worked out fine.
  • The recipe calls for 1 pound of boneless skinless chicken breasts cut into strips. I used a pound of the thinly sliced chicken breasts and I thought the size was perfect!
  • My lemon was on the smaller size and didn't produce enough zest (I got about 1 1/2 teaspoons instead of the 2 teaspoons). I squeezed a little bit of the lemon into the sauce to make up for it but I don't think I needed it. 
  • If you're a brown rice person (I am not) then you could definitely substitute that in place of the white rice that is called for.
  • I usually tweak recipes when I make them but I am trying hard to make them as the recipe says to at least the first time. This one, when I make it again, I will make exactly the same way (unless husband can come up with his "something crunchy" that it needs).
Related Posts Plugin for WordPress, Blogger...