Showing posts with label main dish. Show all posts

Monday, October 13, 2014

New Recipe: Baked Three Cheese Gnocchi Mac & Cheese

This is the last of my new recipes from last week. I've always been intrigued by gnocchi and a little intimidated by it. Plus, most of the gnocchi dishes I've seen have either been served with a tomato based sauce (doesn't excite me) or a pesto (can't stand pesto). When I found this recipe for Baked Three Cheese Gnocchi Mac & Cheese it seemed very first-time-gnocchi-cooker-and-eater friendly. 

I was right! I love that the cheeses in it aren't crazy specialty cheeses, that always makes me more likely to make something. I got this dish ready to go the night before so I could just pop it in the oven when I got home and it could bake while Husband grilled some pork tenderloin and my beans cooked. We ate it as a side dish but I'm thinking it could totally hold it's own as a main dish.

Looking at this picture makes me sad because I know there
are no more leftovers in my fridge. (Also, I doubled the recipe...
that's why it's in the 9x13 casserole dish.)
Baked Three Cheese Gnocchi Mac & Cheese

Ingredients:

  • 1 pound Potato Gnocchi (found in the pasta aisle)
  • 3 tablespoons butter
  • 1 1/2 tablespoons flour
  • 3/4 cup milk (I used skim)
  • 1/3 cup shredded cheddar cheese
  • 1/3 cup shredded mozzarella cheese
  • 2/3 cup shredded Parmesan cheese, divided
  • 1/4 cup bread crumbs
  • 1 clove garlic, minced or pressed
  • 1/2 teaspoon onion powder
  • 1/4 teaspoon salt
  • 1/4 teaspoon pepper
  • 1 tablespoon dried parsley (or chopped fresh, if you want)
Directions:
  1. Preheat your oven to 375 degrees and spray your casserole dish with cooking spray (If you're not doubling the above recipe, like I did, an 8x8 casserole dish should work. If doubling, use a 9x13 dish.) 
  2. Cook your gnocchi according to the package directions. Drain and transfer to your casserole dish. 
  3. Original recipe says to do this in a skillet but I used a sauce pan. In a medium sauce pan, melt butter then add your garlic and onion powder. Let that cook a few minutes to soften your garlic then add the flour and whisk until it's bubbly.
  4. Add the milk, salt, and pepper. Stir until its thickened (2-3 minutes?).
  5. Add the cheddar, mozzarella, and 1/3 cup Parmesan and remove from the heat. Continue to whisk until the cheese is melted. 
  6. Pour the cheese sauce over the gnocchi (you may have to mix it some). Top with the remaining Parmesan cheese, bread crumbs, and sprinkle with parsley. 
  7. Bake for 20 minutes or until the top is golden brown. Let stand a few minutes before serving...try not to attack the casserole pan with your fork while try to be patient.
Recipe Source: Living Better Together


Notes/Suggestions:
  • Like I said, I love that this recipe uses "normal" cheeses. It's what made me pick it. I did shred the cheddar cheese & Parmesan cheese myself (I used a sharp white cheddar and fresh Parmesan) but my mozzarella was the pre-shredded in the bag kind. 
  • I love leftovers, that's why I doubled this. It reheated pretty well, a little greasy but that's normal with mac & cheese.
  • Grant didn't want to try this, he said "I don't like it". I ended up telling him that it was mac & cheese with special noodles (Is that a lie? I'm not sure). He ended up trying it and ate at least half of what I put on his plate and told me "Mmmm. That is good. Mama. You...are the best cooker." I think he got a popsicle that night.
  • I served this with THIS pork tenderloin recipe and some green beans (Grant's current favorite vegetable - he had two huge helpings that night). Awesome flavor and you can grill it or cook it in the oven (we've always grilled it but I like that the oven can be my back-up plan in case of rain).
Enjoy!

Thursday, October 9, 2014

New Recipe: Million Dollar Spaghetti

Comfort Food Week continues! Much like Monday night's Chicken & Dumplings Casserole, I wasn't thinking "healthy" when I picked this meal...I was thinking "How much of that can I cram in my face before I hate myself?" 

Spaghetti is pretty basic, right? I mean, who doesn't love spaghetti? 

Me. 

I don't love it. I eat it, I don't hate it or anything. But it's not one of those meals that makes me excited to sit down to the dinner table. But I live with two spaghetti lovers so I make spaghetti (Grant did a serious happy dance in the kitchen when he found me making spaghetti). But that's why I love recipes like this Million Dollar Spaghetti. We can all get excited about it. It's sort of like deconstructed lasagna. Spaghetti casserole. Fancy spaghetti. Spaghetti that got dressed up for a really important job interview. Whatever. It was loved in my house.


Million Dollar Spaghetti
(this is the recipe as I found it; I'll add my notes, as usual, at the end)


Look at those layers...and the cheesy goodness.
Ingredients:

  • 1 lb. ground beef
  • 1 can of spaghetti sauce (I used Hunts)
  • 8 oz. package of cream cheese, softened
  • 1/4 cup sour cream
  • 1/2 lb. cottage cheese (I prefer small curd, not low-fat)
  • 1 stick of butter
  • 8 ounces of spaghetti noodles
  • 1 bag of cheddar cheese
Directions:
  1. Preheat your oven to 350. Boil your noodles according to the package directions (if you haven't already skipped ahead and done this.
  2. While your noodles boil, mix together the cream cheese, sour cream, and cottage cheese. Make sure they are mixed well.
  3. Cook your ground beef, drain it, add your can of spaghetti sauce to it.
  4. Now for layering: put a few slices of your stick of butter on the bottom of a 9x13 casserole dish; on top of that layer half your noodles; pour the cream cheese mixture (all of it) on top of the noodles and spread it around so it's even; add the rest of your noodles on top of that and put a few more slices of butter on top of those noodles; pour your meat sauce on the top of all that and spread it around so it's even. Bake for 30 minutes.
  5. When it's baked for 30 minutes, add your cheese to the top. The whole bag...there's really no point in cutting calories now. Bake for 15 more minutes or until it's a little brown on top.
  6. Unless you're starving, I'd let it sit for 5-10 minutes before serving (use that time, like I did, to pop some frozen garlic bread in the oven - its Fall, your body needs the extra carbs).
Recipe Source: being grown up


Notes/Suggestions:
  • I omitted the butter entirely from this dish. I guess that makes the above recipe a bit of a lie. I sprayed my pan with non-stick cooking spray and everywhere where it says to put slices of butter...I did not. I've never used butter in spaghetti and it just seemed unnecessary here. I didn't miss it.
  • I felt like the cream cheese/sour cream/cottage cheese mixture was a large amount for only 8 ounces of noodles. I cooked a whole 16 ounce package and ended up using almost all of it.
  • If - like me - you go with extra noodles, you'll want to up your sauce to. My meat sauce had about 1 1/2 cans of sauce and I ended up heating the extra 1/2 can for us to spoon on top if needed (Husband always likes extra sauce).
  • I added some parmesan cheese to my cream cheese mixture and I used and italian cheese blend on top in place of cheddar. It was really good but cheddar would have been too.
  • BIG hit in my house! Husband had two servings and Grant couldn't get his into his face fast enough. At one point Grant leaned back, looked down and rubbed his stomach saying "Mmm mmmm. This is good. This is yummy in my tummy."
Enjoy!

Wednesday, October 8, 2014

New Recipe: Chicken & Dumplings Casserole

I've declared it Comfort Food Week at my house! Fall is HERE and I love it. I've been wanting to cook and eat some good comfort food. I enjoyed summer cooking, enjoyed finding good things to eat that didn't make me want to anchor myself to the couch. But comfort food season is here and this week I'm going a little crazy.

I've got three new recipes to try on my menu this week (four if you count the no-bake dessert I'm taking to my mother-in-law's on Saturday)...I'm feeling a little ambitious! Monday night I tried this Chicken & Dumplings Casserole from The Country Cook. I've seen several variations of this casserole but this one in particular I noticed last week and it looked like a good weeknight meal. I'm a big fan of chicken & dumplings but have never made them from scratch myself (though I enjoy eating it when others take the time). This casserole was a good substitute. SO yummy! I'm excited that I decided to try it.  


This picture really doesn't do it justice at all.
Chicken & Dumplings Casserole

Ingredients:

  • 1/2 cup (1 stick) butter
  • 1/2 cup onion, chopped
  • 2 ribs of celery, chopped
  • 3 cups cooked chicken (shredded or cubed)
  • 1 cup self-rising flour
  • 1 cup milk (2% or higher)
  • 2 cups chicken broth
  • 1 can Cream of Chicken Soup
  • salt & pepper to taste
Directions:
  1. Preheat your oven to 350. Spray a 9x13 casserole dish with cooking spray.
  2. In a skillet over medium heat, melt your butter then add your chopped onion and celery. Cook until the veggies are soft (this took at least 10 minutes for me). You can season your veggies with salt & pepper if you like.
  3. Pour the veggies and all that glorious butter into your casserole dish and spread it around so it covers the bottom. Layer your chicken on top of the veggie/butter mixture (season with salt & pepper if you so desire).
  4. In a mixing bowl combine your self-rising flour and milk then pour it over the chicken layer. Do not stir!
  5. In the same mixing bowl (you could use a new one but why?), mix your Cream of Chicken soup and chicken broth. At this point you can season this with salt & pepper too. Pour that mixture on top of everything in the casserole dish. Again - do not stir!
  6. Pop your uncovered dish into the oven to bake for 40-45 minutes or until your casserole is set. (As Brandie - The Country Cook - notes, everyone's oven is different. This took about 45-50 minutes in my oven).
  7. You could finish this with a sprinkle of parsley if you want to make it pretty. I was too hungry and too excited to eat this to remember parsley.
Recipe Source: The Country Cook (She has great step-by-step photos of this dish and some good suggestions along with a plug for the cookbook she got it from. Also, her site is loaded with great recipes.)


Notes/Suggestions:

  • You can use a rotisserie chicken for the chicken in this dish, usually I would. But the store where I prefer to buy them was out so I bought a package of chicken breasts (I think there were 5 in there), boiled them in seasoned water, then trimmed & cubed them when they were cooled a little. Typically I'm not a fan of boiled chicken but it totally worked here. Next time, I'd maybe use Brandie's tip for shredding the chicken in my stand mixer.
  • A stick of butter is a lot of butter to me. Usually I'd cut it down but I was worried it may affect the dumplings layer so I used the whole stick. This dish was super so I don't know that when I make it in the future if I'd mess with the butter. Plus, I love butter.
  • See THIS POST about the lower sodium ingredients I use (says the girl who just admitted she loves butter). I did use the low-sodium chicken broth I have on hand but had to buy regular Cream of Chicken soup (the store was out of the healthy request stuff). It was delicious as is but I think next time I'll use the healthy request just to make myself feel a bit better about that stick of butter).
  • I cooked & chopped my chicken the night before and also the celery & onions. Since this dish takes 40-45 minutes to bake, I wanted to be able to put it together as quick as possible. The early prep made it much more week-night friendly.
  • Husband & I really enjoyed this dish (and it heated wonderfully the next day for my lunch!). Grant, not so much. But he's weird about casseroles. Husband isn't a fan of celery in things and I'm not a fan of onions but neither of us minded our less-than-favorite veggies in this dish. It had great flavor.
Enjoy!


Friday, April 11, 2014

New Recipe: PW's Tortellini Primavera

I saw this recipe on the Pioneer Woman's site last week and it immediately went on my menu for the week. Then I ran out of steam toward the end of the week...so I made it this week. I thought the combination of pasta and fresh veggies would be a tasty spring meal and it was! Even Grant ate it.


Tortellini Primavera

Ingredients:
  • 2 tablespoons butter
  • 1 whole medium onion, finely diced
  • 3 cloves garlic, minced
  • 3 whole carrots, peeled and diced
  • 1 cup cauliflower, broken or cut into small pieces
  • 1/4 cup white wine
  • 1/2 cup chicken broth
  • 1/3 cup heavy cream
  • 1/2 cup grated Parmesan cheese
  • salt & pepper, to taste
  • 8 whole basil leaves, chopped
  • 3/4 cup cooked ham, diced
  • 1 cup frozen peas
  • Extra Parmesan & basil for serving
  • 1 pound cheese (or spinach) tortellini
Directions:
  1. Cook tortellini a couple of minutes less than package directions call for. Drain and set aside.
  2. Melt the butter in a large skillet over medium-high heat. Add the onions and garlic and stir to cook for 1 minute.
  3. Add the carrots and cauliflower, stir, cook for 1 minute.
  4. Add the wine and broth, then cook for 2 to 3 minutes, until the liquid reduced some.
  5. Add in cream and Parmesan cheese, stir. 
  6. When mixture is hot, add the peas, ham, salt, and pepper. Allow them to heat up in the sauce. When the sauce is hot, stir in the cooked tortellini.
  7. Taste test your seasonings and add more if necessary. Serve with extra Parmesan and basil, if desired.
Recipe Source: The very awesome Pioneer Woman


Notes/Suggestions:
  • The above recipe is PW's original recipe. I didn't use wine or basil. We don't keep wine of any sort around this house so I substituted more chicken broth in place of the wine. I thought it tasted fantastic. And I just don't like basil but if you do, I bet its very tasty on this dish. But if you're like me and you don't like it, your dinner will not be ruined by the absence of basil.
  • I highly recommend checking out the recipe on PW's site. Not only are there, as usual, step-by-step pictures but also a list of things she recommends as add-ins for this dish. I added 3-4 ounces of cream cheese since she suggested it (which I added at the same time as the cream and Parmesan). It was great!
  • Next time I'll thaw my peas. I was leery of the peas anyway because...well, they're peas. However, this pea hater ate every pea on her plate because they were so yummy in this dish...just a bit too crunchy. Your cauliflower & carrots may be crunchy too but I'm good with that.
  • Ham! Oh how I love ham. I used pre-diced ham since this was going to be a weeknight meal and I wanted to cut down on prep. I chose the smaller diced pieces but they ended up sort of disappearing into the dish. Next time, I'd go with larger pieces or just buy ham steaks and chop them myself.
I've never made a PW recipe that I didn't like or that turned out bad. Check out her stuff, she's awesome! 
ENJOY!

Wednesday, April 9, 2014

New Recipe: Crockpot Brown Sugar Balsamic Glazed Pork Tenderloin

This recipe is one I've had my sights on for a while but I was slightly intimidated by it. Now that I've made it, I'm not sure why because it was pretty easy...and REALLY good! I found this recipe for Crockpot Brown Sugar Balsamic Glazed Pork Tenderloin on Pinterest. There seem to be a gazillion verstion of this but that link is for the one I used specifically.


Crockpot Brown Sugar Balsamic Glazed Pork Tenderloin


Meat:
  • 2 lbs pork tenderloin
  • 1 teaspoon ground sage
  • 1/2 teaspoon salt
  • 1/4 teaspoon pepper
  • 1 clove garlic; crushed
  • 1/2 water
Glaze:
  • 1/2 cup brown sugar
  • 1 tablespoon cornstarch
  • 1/4 cup balsamic vinegar
  • 1/2 cup water
  • 2 tablespoons soy sauce
Instructions:
  1. Mix together the seasonings: sage, salt, pepper and garlic. Rub the mixture over tenderloin(s). Pour 1/2 cup water in crockpot and put tenderloin(s) in crockpot.
  2. Cook on low for 6-8 hours.
  3. An hour before the meat is finished, mix together the ingredients for the glaze in a small sauce pan: brown sugar, cornstarch, balsamic vinegar, water, and soy sauce.
  4. Heat over medium heat and stir until mixture thickens (she says about 4 minutes). Brush roast with glaze 2 or 3 times during the last hour of cooking. For a more caramelized crust: remove from crockpot and place on aluminum lined baking pan, glaze, and set under broiler for 1-2 minutes until bubbly and caramelized. Repeat 2-3 more times until desired crust is achieved.
  5. Serve with remaining glaze on the side.
Recipe Source: Laura's Sweet Spot


Notes/Suggestions:

  • I made this exactly as the recipe said but my pork tenderloins (it was a package of two) were about 2.5 lbs. It still turned out great.
  • I glazed mine in the crockpot and caramelized it under the broiler. I was really afraid to burn it so I didn't leave it in there as long as I should have. Next time - I will be making this again - I'll be a little braver with the broiler.
  • The glaze is awesome! Not too sweet. Husband wanted to stick a fork in each end of one of the tenderloins and just gnaw the outside off like corn on the cob.
  • Reheated pretty well for lunch the next day :)
  • Kid tested, kid approved!
ENJOY!


Monday, March 17, 2014

New Recipe: Bacon Cheese Burger Casserole

I actually tried this recipe a while back but am only now getting around to posting about it. I had been combing through my old issues of Kraft Food & Family and stumbled across this recipe for Bacon Cheese Burger Casserole. It's a bit outside the box for me as far as casseroles. Almost all the casseroles I make have chicken in them. I just don't cook with beef with that much. I guess that's what made me want to try this. Well, that and I live with two burger lovers who I thought might enjoy something like this (and they did).


Ingredients:
  • 1 lb. ground beef
  • 1 onion, chopped
  • 1/3 cup ketchup
  • 2 Tbsp. yellow mustard
  • 1 cup shredded sharp cheddar cheese
  • 8 slices bacon, cooked & crumbled
  • 4 cups (1/2 of a 32 oz. pkg) frozen tater tots
Directions:
  1. Heat your oven to 400 degrees.
  2. Brown the meat with onions in a skillet and drain. Stir in ketchup and mustard; spoon into 9-inch square casserole dish (that you've sprayed with cooking spray).
  3. Top with cheese, bacon, and tater tots.
  4. Bake for 30-35 minutes or until casserole is heated through and the tater tots are golden brown.
Recipe Source: Kraft Recipes


Notes/Suggestions:
  • I'm not a fan of chunky onions in my food so when I can help it - such as in this recipe - I use onion powder.
  • Shocker: I used more than one cup of cheese. I also used a few extra slices of bacon. Sue me.
  • I was initially put off by mixing the ketchup & mustard into the meat. I have no idea why since that's pretty normal on a burger but it weirded me out. But you know what? It was good. And not an overwhelming ketchup/mustard flavor either.
  • The recipe says to use frozen tater tots and that worked out fine. I didn't come across any uncooked potatoes (a turn-off for sure) but in the future I think I'll thaw them. I like my tater tots crispy and I would have overcooked the casserole to get them up to my crispy standards.
  • Dishes like this make me think "What do we have with it?!" because I don't feel like its enough all by itself. So I served it with salad but some veggies would be good too.
  • Easy weeknight or any night meal. It could even be made the night before so you can just pop it in the oven when you get home. Good stuff.
Enjoy!

Tuesday, February 4, 2014

New Recipe: Monterey Chicken Pasta Bake

I have been a new recipe fool lately. I was going to say "new recipe whore", but my mother-in-law reads this so I'm thinking I shouldn't use the word "whore" in posts my mother-in-law reads. So I'm going with new recipe fool. Anyway, I was going to through some past issues of Kraft Food & Family one weekend and came across several yummy recipes to try. I've been very lazy about cooking lately and I think it's mostly because I'm bored with all my usual dinner suspects.

Enter Monterey Chicken Pasta Bake. It's sort of like macaroni & cheese on steroids. Not the kind of steroids that spark a federal investigation and get you suspended from baseball games. Good steroids. The kind of steroids that your macaroni & cheese would take to make you love it more. So...it's really good.


Monterey Chicken Pasta Bake

Ingredients:
  • 3 cups rigatoni pasta, uncooked
  • 1/4 cup butter
  • 1 small onion, finely chopped
  • 1/4 cup flour
  • 1 can (14.5 oz) fat-free reduced-sodium chicken broth
  • 1 pkg. (7 oz) shredded Monterey Jack cheese, divided
  • 3 cups chopped cooked chicken
  • 6 slices bacon, cooked and crumbled
  • 2 Tbsp. grated Parmesan cheese
  • 1 Tbsp. chopped fresh cilantro
  • 1/2 cup chopped tomatoes
Directions:
  1. Heat oven to 350 degrees.
  2. Cook pasta as directed on package (omitting salt).
  3. Melt butter in a large nonstick skillet on medium heat. Add onions; cook and stir 6 minutes or until crisp-tender. Blend in flour; cook and stir 1 minute. Gradually stir in broth; cook 5 minutes or until thickened, stirring constantly. Add 1 cup shredded cheese; cook and stir 1 minute or until melted.
  4. Drain pasta. Add to ingredients in skillet along with the chicken and bacon; mix well. Transfer to a 13x9-inch baking dish sprayed with cooking spray; top with remaining shredded cheese. Cover.
  5. Bake 40 minute, uncovering and topping with Parmesan for the last 10 minutes. Top with tomatoes and cilantro.
Recipe Source: Kraft Foods Recipes


Notes/Suggestions:
  • If you've ever read one of my new recipe posts, this will come as no surprise but...I added twice the amount of cheese called for in the above original recipe. And it was fantastic.
  • I also used 9 instead of of 6 pieces of bacon. I like to live dangerously. The use of extra bacon was very much Husband-approved.
  • I think cilantro is yucky so I omitted that and just sprinkled some dry parsley on top for pretty.
  • This is a bit of a time consuming dish, or at least it was for me. And I even cut corners by using rotisserie chicken and onion powder in place of chopped onions. It's not a really quick weeknight meal but I'm definitely keeping it in my recipe arsenal.
Enjoy!

Tuesday, January 15, 2013

New Recipe: Meatball Sub Casserole

Here is another new recipe from another new cook book! Husband is beginning to wish he hadn't gotten me so many cook books because, he says, he's been eating like crazy. And he did eat this recipe like crazy...two helpings and then picked more out of the casserole dish until I yelled at him. I can't blame him, I loved it too and I've never been a big fan of meatball subs.


Yum.
Meatball Sub Casserole
Ingredients:

  • 1 loaf Italian bread, cut into 1-inch thick slices
  • 1 - 8 oz. package cream cheese, softened
  • 1/2 cup mayonnaise
  • 1 tsp. Italian seasoning
  • 1/4 tsp. pepper
  • 2 cups shredded mozzarella cheese, divided
  • 1 - 1lb package frozen meatballs, thawed
  • 28 oz. jar pasta sauce
  • 1 cup water
Directions:
  1. Arrange bread slices in a single layer in an ungreased 13"x9" baking pan; set aside.
  2. In a bowl, combine cream cheese, mayonnaise, and seasonings; spread over bread slices. Sprinkle with 1/2 cup cheese; set aside.
  3. Gently mix together meatballs, spaghetti sauce, and water; spoon over cheese. Sprinkle with remaining cheese.
  4. Bake, uncovered, at 350 degrees for 30 minutes.
Recipe Source: Gooseberry Patch


Notes/Suggestions:
  • This may come as a shock, but I didn't follow this recipe exactly. I added more mozzarella cheese. I also added some grated Parmesan cheese in the cream cheese/mayonnaise layer. Making an "Italian" dish without Parmesan cheese just seemed wrong.
  • I left out the Italian seasonings. I can't stand oregano.
  • I couldn't find a 1 lb bag of meatballs. The store where I was shopping only had a 2 lb bag. So I just used one of my bigger casserole pans and upped the amount of sauce to 2 jars.
  • Since I made a bigger casserole, I baked it at 375 instead of 350.
  • I left out the water...that seemed like a weird ingredient.
  • After all my modifications...it turned out great! Great meal for any night of the week served with a good salad.
ENJOY!

Monday, January 14, 2013

New Recipe: Pioneer Woman's Braised Beef Brisket

I actually made this recipe on January 1st. My very first new recipe of the new year! One of my Christmas presents was a cook book I've been wanting for a while. The Pioneer Woman Cooks: Recipes From An Accidental Country Girl (Want one? Amazon has it here). I had never opened this cook book but I follow her blog and I love her recipes. Surprise to me, looking through this cook book I noticed that not only does every recipe look awesome but there are step by step pictures with all of them. I love that!

So I picked her braised brisket recipe to start with. Silly of me, considering I rarely cook a beef recipe well. But this one turned out good! I was rather proud. Husband and I are big brisket lovers and it's hard to find really good brisket. I think Husband was a little disappointed because this isn't like BBQ brisket. He said it had more of a pot roast thing going on, but for me it was different than pot roast.

I'm not going to re-type Pioneer Woman's recipe here. You can find it on her blog HERE. She has lots of great step-by-step pictures and the whole recipe. She's much more detailed than I would be so it's best to get it there.


Out of the oven after 4.5-5 hours in the oven.
Sliced (after trimming the fat) and ready for dinner!


I served mine with twice baked potatoes and corn.
Notes/Suggestions:
  • I followed the recipe as exact as I could. PW said to use a 7-10 pound brisket but the biggest cut we found was 5.5 lbs. Next time I'll think farther ahead and get a custom cut.
  • When she says to marinate 24-48 hours, she means it. I ran out of time and mine only marinated about 20 hours. It wasn't tough by any means, but I definitely think it should have marinated longer. Next time I'll allow for more time.
  • GREAT FLAVOR! While it's obviously not a BBQ style, it has great flavor.
  • Reheated amazingly well. Both of took left overs for lunch and agreed that it reheated very well.
My favorite thing about PW's recipes is that she uses REAL ingredients. I got all the ingredients for this recipe at Walmart (except the meat) and they're the exact brands that PW used. I'm looking forward to making more stuff from my new cook book!

I unknowingly made another recipe from this cook book for our Father's Day cookout. Check out PW's The Best Chocolate Sheet Cake. Ever.

Thursday, January 26, 2012

New Recipe: Pizza Casserole

I love a casserole. I am always on the prowl for a new and delicious casserole recipe. Sometimes they make me feel lazy. Even though they're not all as simple as throwing some ingredients into a 9 x 13 pan. This one was pretty easy by casserole standards. And it was tasty. Score! This Pizza Casserole recipe is another that I found on Pinterest. Besides the food blogs that I read, it's really my favorite place to find new recipes.

I sort of forgot to take a picture before we attacked it with the serving spoon.

Pizza Casserole
  • 1 bag of Egg Noodles (I think mine was a 16 oz bag)
  • 1 extra large can of Ragu sauce (or any tomato sauce you prefer)
  • 3 cups shredded mozzarella cheese (or more depending on how much you like cheese!)
  • 1 1/2 lbs ground beef
  • 1 package pepperoni
Directions:
  1. Boil the noodles according to package directions.
  2. While the noodles cook, brown the ground beef and drain it.
  3. Preheat the oven to 350 degrees.
  4. Now you can start layering your casserole like this: Spread a thin layer of tomato sauce on the bottom of your casserole dish. Then layer half your noodles, then half the meat, then half your sauce. On top of that, layer the rest of your noodles, half of the cheese, the rest of your meat, the rest of your sauce, and then the rest of your cheese. Spread your pepperoni on top of that (However much or little of the package as you want. It depends on your pepperoni preference.)
  5. Cover the casserole dish with foil and bake for 30 minutes. After the 30 minutes, remove the foil and bake for another 15 minutes. Remove from oven and let sit for about 10 minutes before serving.
Recipe Source: For Mamas

Toddler tested. Toddler approved.
Notes/Suggestions:
  • When re-typing the recipe I debated on what to put for the cooking temperature. She has 350 but this casserole is HUGE. I recommend 375 degrees. I did mine at 350 and took it out after about 25 minutes and some of the middle cheese hadn't even melted. So I turned up the oven after that and left the foil off (although the foil is necessary for most of the process). But after that it cooked fine and the pepperoni got nice and crispy :)
  • I added black olives to the one of the meat layers because all three of us (yes, Grant included) are black olive fans. Yum!
  • I used a little extra cheese. Ok, I used a whole cup of extra cheese. (So that's 4 cups instead of the original 3 cups.)
  • Lots of room with this recipe to be creative and make it your own. Anything you like on a pizza could pretty much be added to one of the layers. As long as you have a big enough casserole dish :)
  • Great weeknight meal because it doesn't take too much time to get together. It could even be put together the night before if you're feeling ambitious and then just throw it in the oven when you get home.
  • HUGE casserole. It makes a ton. So it's great for leftovers or to feed a crowd (hello potluck!).
This one was a big hit with the three of us. Even me and I'm really not a fan of spaghetti/pizza sauce. Grant, who isn't a big meat eater, couldn't get it in his mouth fast enough and never stopped to think about the hamburger meat. I'll definitely be making it again. I'd love to know how it turns out if anyone tries it. Enjoy!

Monday, January 23, 2012

New Recipe: White Chicken Enchiladas

Another new recipe? Hooray for me! It seems that I'm working my way out of the recipe rut that I had said I'd gotten into. Although, taking medicine that makes me feel like I've pounded three pots of coffee in a very short period of time is probably helping me in the motivation department. Who cares. I'll take it. After weeks of feeling like doing nothing more than anchoring myself to the couch it feels good to have some ambition.

This new recipe comes, once again, by way of Pinterest. If that's not a site you're familiar with then you should get familiar with it in a hurry! There are so many great things there. I saw this recipe just this past week and with the small ingredient list and very basic instructions, I knew it would work itself into our menu soon. So I made it last night.


White Chicken Enchiladas
with green chili sour cream sauce

  • 10 soft taco shells
  • 2 cups cooked, shredded chicken (I used a rotisserie chicken)
  • 2 cups shredded Monterey Jack cheese
  • 3 Tbsp. butter
  • 3 Tbsp. flour
  • 2 cups chicken broth
  • 1 cup sour cream
  • 1 (4 oz) can diced green chilies
Directions:
  1. Preheat oven to 350 degrees. Spray a 9x13 pan with non-stick cooking spray.
  2. Mix chicken and 1 cup cheese. Evenly distribute the chicken/cheese mixture and roll it up in the tortillas. Place them in the prepared pan.
  3. In a sauce pan over medium heat, melt butter. Stir in flour and cook 1 minute. Add broth and whisk until smooth. Heat until thick and bubbly.
  4. Stir in sour cream and chilies. Do not bring to a boil, you don't want curdled sour cream.
  5. Pour over enchiladas and top with remaining cheese.
  6. Bake 20-22 minutes and then broil on high for 2-3 minutes to brown the cheese. Let stand 10 minutes before cutting into it.
Recipe Source: Joyful Momma's Kitchen


Notes/Suggestions:
  • I don't really "do" spicy so I was kind of a wuss about the green chilies. I didn't use a full 4 ounces and I also drained them considerably. Next time I'll be a little braver because I really couldn't tell they were there. So little heat from them, in fact, that I would have let Grant have it instead of the lasagna that he did have.
  • My sauce never got "thick and bubbly" while I was cooking it but after it cooked in the casserole pan and sat for a few minutes after I took it out of the oven I felt like it was the perfect consistency.
  • This is a fairly "naked" dish so it's got a lot of room for creativity if you feel like getting crazy. You could add all sorts of stuff in with the chicken & cheese mixture. Husband's first suggestion was bacon...men and bacon.
  • The only adjustments I made were to the sauce. I added a little bit of salt because I use a very low sodium chicken broth and I like that I can control the amount of salt that goes into the sauce. I also added a little bit of onion powder. However, I did not use any extra cheese! I'm kinda proud of that.
  • Great dish for picky eaters! I can say that with confidence because I'm pretty picky. Also a good weeknight dish because it goes together very easily. Especially if you use a rotisserie chicken. I cooked a little bit of white rice to go with them but you could skip the rice and go for a side salad or vegetable too.
I'd love to know if anyone tries it. Enjoy!

Stay tuned in the next couple days for another new recipe! My kitchen is a busy place these days!

Wednesday, September 21, 2011

New Recipe: Cheesy Chicken Casserole

I have lost count of how many recipe websites have my e-mail address. But there are enough that I get at least 20 new recipes in my e-mail every day. Some I delete because I know I'd never attempt to make them and some I delete because they just don't look good. But the ones that look yummy AND Grant friendly? Keepers. This recipe for Cheesy Chicken Casserole I saw in an e-mail and I made it the next night. It's a little bit like the Chicken Tetrazzini that I posted a while back. Nothing went to waste, it was super yum.


Cheesy Chicken Casserole
3 to 4 cooked chicken breasts, chopped
(you can use the meat from a rotisserie chicken from the grocery store deli)
1 (16 oz.) package egg noodles, cooked
1 (24 oz.) container light sour cream
2 cans Campbell's Healthy Request cream of chicken soup
1 (8 oz.) package shredded cheddar cheese
1 (8 oz.) package shredded mozzarella cheese
1 sleeve Ritz crackers, crushed
1/4 cup margarine, melted

  1. Combine chicken, noodles, sour cream, soup, and cheese in a large bowl.
  2. Pour into a 13" x 9" baking dish that has been sprayed with non-stick cooking spray.
  3. Mix together cracker crumbs and margarine and sprinkle over the top.
  4. Bake at 350 degrees for 25-30 minutes or until the crackers are golden brown.
Adapted from: myrecipes.com


Toddler tested. Toddler approved.
Notes/Suggestions:
  • My only real problem with this recipe was that it needed a vegetable added to it to make it feel like it was better for me. Only that didn't occur to me until we were eating it. Next time I'll probably add some broccoli and/or maybe some carrots because that's Grant's favorite veggie.
  • Reheats well for lunch the next day. And then for dinner again. It's kind of a huge casserole. 
Enjoy!

Friday, September 9, 2011

New Recipe: Crock Pot Chicken Taco Meat

Like my new look for fall? The weather is starting to show signs that fall is coming and fall is my favorite season. So I thought I'd do a little redecorating for my blog :)

Another crock pot recipe! LOVE my crock pot! We had a mexican themed luncheon at work recently and my friend, Henri, brought some yummy shredded chicken for us to make tacos with. I provided the mustaches:


 Ha! Ok, back to the chicken. I had a huge package of chicken in the freezer so over the weekend I decided we'd have chicken tacos on Monday (and Tuesday because we had a lot of leftovers).


Crock Pot Chicken Taco Meat

1 lb. boneless skinless chicken breasts
1 package fajita seasoning or chicken taco seasoning
1 cup chicken broth
1 can Rotel tomatoes, undrained (I used mild)
Garlic powder to taste, optional

Instructions:
  1. Dissolve taco/fajita seasoning in chicken broth. Mix in Rotel if you're using it.
  2. Place chicken breasts in crock pot and pour chicken broth mixture over the chicken.
  3. Cover and cook on low for 6-8 hours.
  4. With two forks (or you can just use your hands) shred the chicken into bite size pieces.
  • To freeze: Place shredded meat into freezer bags with the juices. Press out all the air and seal.
Recipe adapted from: Food.com


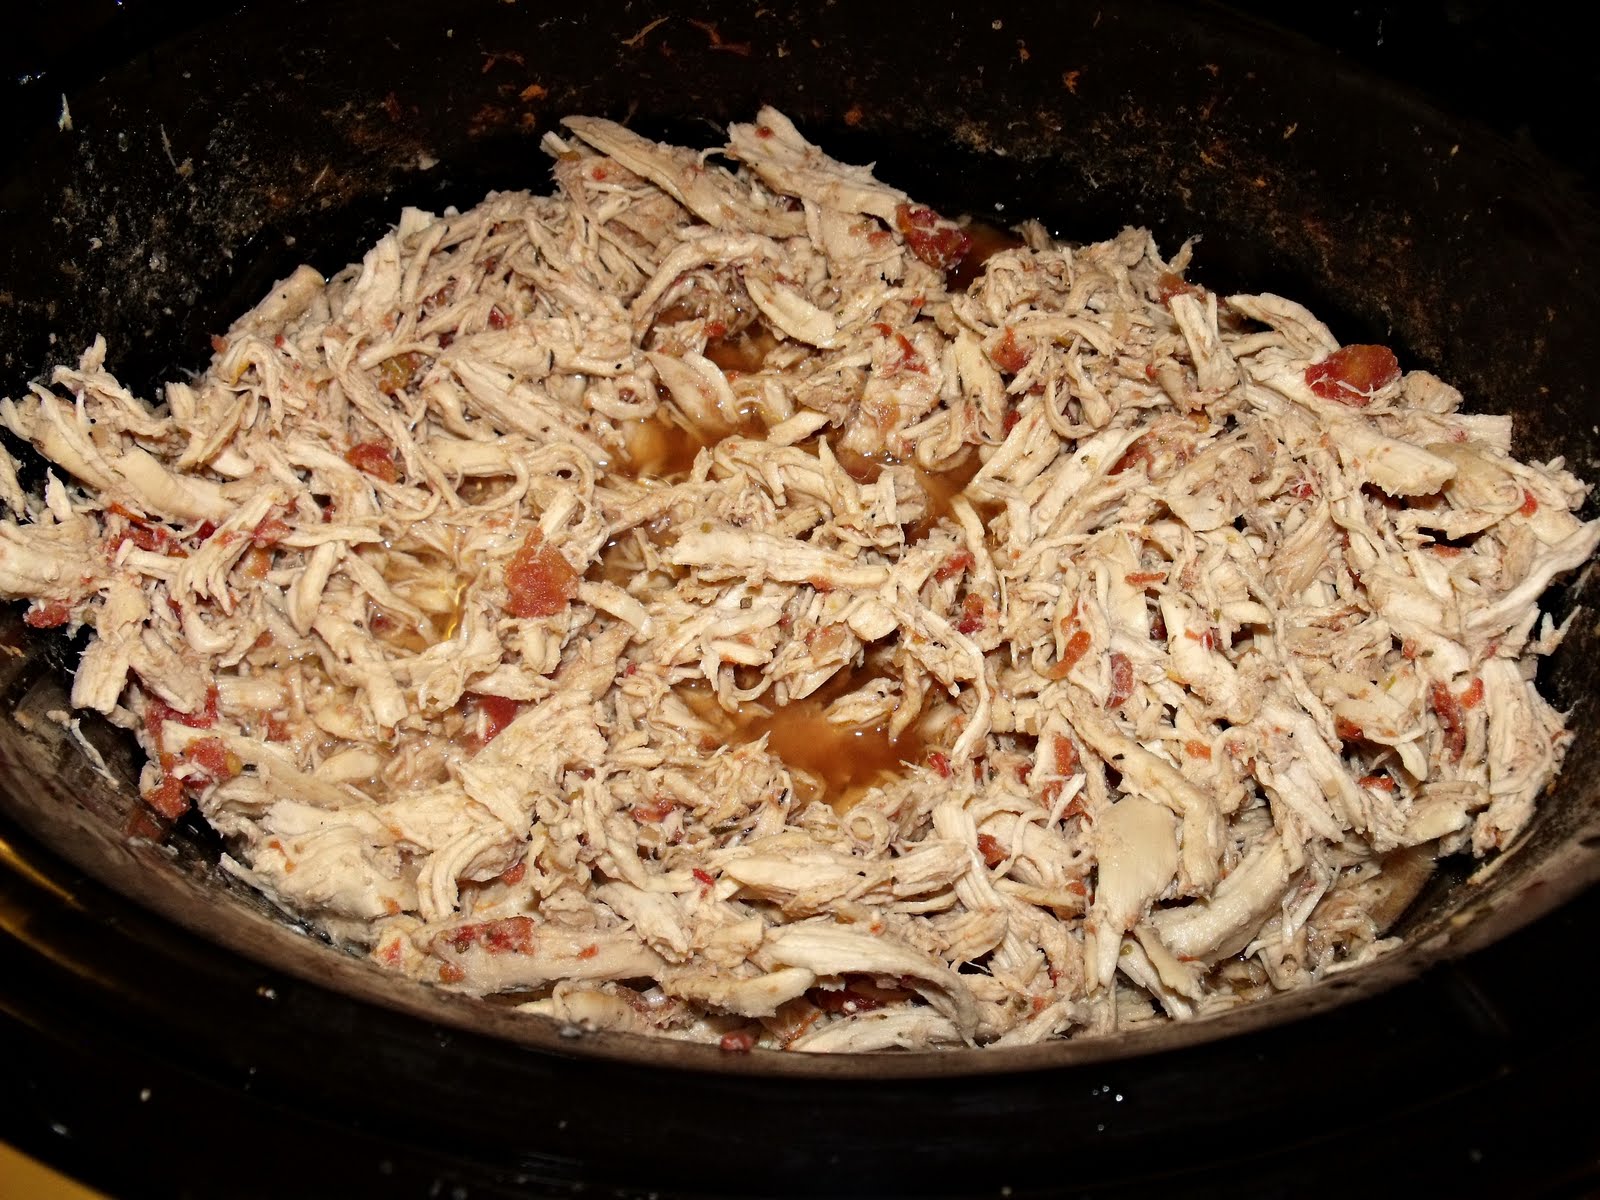
Mmmm...
Notes/Suggestions:
  • I used twice the amount of chicken (because that's just what was in my freezer) so I doubled the amount of chicken broth. The other ingredients could be doubled as well but since I was planning for Grant to eat it as well, I didn't want it to be too spicy. (But he didn't have much interest in it.)
  • Check out the original recipe reviews for some great ideas on how to turn this into a soup. I'm sure it would be really yummy.
  • I'm told this freezes well so it would be great to double up on and freeze half for an easy weeknight meal.
  • I used a low sodium chicken broth. I always try to use a low sodium chicken broth but they usually still have a lot of sodium in them. Through a friend I found a VERY low sodium chicken broth. I found it at Harris Teeter (for anyone reading this that has one in their area) and the brand is called Pacific. It's an organic broth and I usually don't buy into all that organic hype but this only has 70 mg of sodium per serving compared to others that have close to 500 or more. It's a little more expensive but so worth it - and still tasty too.
  • Check out some other recipes from my friend Henri: Pork Tenderloin (also a crock pot recipe) and Chicken Tetrazzini (great make-ahead meal)
Enjoy!

Saturday, July 30, 2011

New Recipe: Buffalo Chicken & Potato Casserole

I didn't think I was going to get in my two new recipes for this month. But I managed to pull them both off this week (I will try to post the second one tomorrow). Monday night I decided it was time for something different. I had been eyeing a recipe for Buffalo Chicken & Potato Casserole that I figured Husband would love and I decided it was time to make it. I'm not a huge fan of spicy food but I figured I could handle this one. In the interest of trying something new I kept an open mind.

Looks yummy, doesn't it?
I'm going to be honest: I didn't like it at all. And it had nothing to do with the hot sauce, that part actually wasn't bad or too hot for me. I felt like the casserole was just missing something. It does have quite a bit of ranch in it and I'm not a lover of ranch so that could be part of my problem with it. Why post the recipe, you ask? Well, I did challenge myself to try two new recipes each month - and post about my findings whether they be good or bad. But also - Husband loved it. He literally ate 3/4 of the casserole dish and said he'd eat it again if I made it. And he brought the leftovers to work and a co-worker of his gobbled it up and said it was great. So perhaps, I'm just overly picky.

Buffalo Chicken & Potato Casserole

  •  1 1/4 lb boneless skinless chicken breasts, cut into 1-inch strips
  • 1/3 c. Franks buffalo sauce
  • 6 c. potatoes, grated w/ box grater
  • 1 c. light ranch dressing
  • 1/2 c. cheddar cheese, shredded
  • 1 can condensed cream of chicken soup
  • 1/2 c. panko bread crumbs
  1. Heat oven to 350 degrees F. Spray 13x9-inch baking dish with cooking spray.
  2. In a medium bowl, stir together chicken strips and buffalo sauce. Spoon into baking dish in a single layer.
  3. In the same bowl, stir together potatoes, dressing, cheese, and soup. Spread over chicken. Sprinkle panko evenly over the top.
  4. Cover with foil. Bake 30 minutes; uncover and bake 20 to 25 minutes longer or until potatoes are tender and juice of chicken is no longer pink when center of thickest pieces are cut.
Recipe source: Holy Cannoli Recipes


Notes/Suggestions:
  •  For some reason the potatoes didn't cook completely for me. I did exactly as the recipe said and I grated fresh potatoes. If I try it again I may use frozen hash browns. The fresh ones were very wet and I felt like they made the potato mixture very soupy.
  • I thought the light ranch made for a bad taste. Or maybe I needed to use a name brand ranch instead because I bought the store brand. I try not be a store brand snob because most of the time I find no difference in the store brand versus name brand but in some cases it does make a difference.
  • This recipe could use more chicken. I used exactly the amount of chicken called for and it cooked just fine. But underneath all those potatoes it did seem to turn into a game of Find the Chicken.
  • I firmly believe that this recipe needs bleu cheese. Somewhere. Crumbled or in dressing form. But it is a "buffalo chicken" recipe and it's begging for some bleu cheese.
I'd love to hear the results if anyone out there decides to try this!

Related Posts Plugin for WordPress, Blogger...